Tuesday, May 20, 2008

Source Code Published

I have posted the source code for Corkboard, my multi-touch application for browsing xkcd comics. This, of course, also includes the source for my Objective-C framework for receiving TUIO messages. It is still a little hard-coded for my setup in a few places, but I would be happy to help anybody get it running on their computer. You can find the source and a compiled download at http://code.google.com/p/corkboard/. This is my first Objective-C program, and first time hosting a project on Google Code, so lets hope nothing is missing.

Sunday, May 18, 2008

ISEF Results

Well, ISEF was an awesome trip. I had a great time meeting new people and sightseeing around Atlanta. The fact that the trip was 100% expense paid sure didn't hurt either. The projects there were so amazing I felt it would be extremely lucky to place at all. Saying that, I was overjoyed to hear that I placed fourth in the Computer Science category. The prize money of $500 isn't going to put me through college, but free money should never be complained about. Unfortunately, I did not win any "special awards" from other organizations. I guess I will just have to try again next year. :P

For those of you who are curious, a complete list of the winners is available here.

Friday, May 9, 2008

ISEF Is Next Week!

I have mentioned on this blog that my multi-touch screen was for a science fair project. What I have not revealed is how well it has done so far. Lucky for all of you, I have a nice story to go with each level of competition.

First was my school fair. Unfortunately, my high school, Utah County Academy of Sciences, was not planning on holding a science fair. The other local high schools were not so keen on letting me enter the fair through their school, mostly because my tax money was not with them. Luckily my biology teacher and friend, Angel Busath, was willing to organize a school fair entirely for one contestant. Needless to say, I took first place at that level.

The next level of competition was district. There was a special district fair for all of us charter school misfits who were not allowed to enter with their local school districts. To my utter despair, I did not win at that level. Or at least they didn't announce my name in the awards ceremony. Don't worry though, after a night and a day of heart-crushing defeat and telling everyone I lost, I was informed that I actually made the top three and would be advancing. Whew. I still haven't receive my medal though...

My regional fair was the Central Utah Science and Engineering Fair held by Brigham Young University. This was also where I would be judged for a $10,000 scholarship given out by Symantec for projects which used software written by the contestants. This scholarship was my primary motivation for entering the science fair. Between the judging and the science fair the contestants were allowed to go home and take a break. Well, it had been a long day and I fell asleep, waking up at about 5 minutes after the awards ceremony started. Woops. Luckily, I did not miss the announcement of any of the awards I received. I received recognition from the US Army (no cash!?), a year tuition at the College of Eastern Utah, and third place for the Symantec scholarship. Yep, third. And an external hard drive as a consolation prize to the $10,000. Don't panic though, it turns out happy after all. In addition to the other awards I mentioned, I also won first place in the engineering category and *drumroll* an all-expense-paid trip to Atlanta, Georgia to compete in the Intel International Science and Engineering Fair (ISEF)! Only six people at CUSEF were given this opportunity, so I was very excited to be going. Besides that, I get to miss a week of school testing!

ISEF is next week, and I will be leaving on Sunday, May 11th. I will post back here with the results after the fair. Who knows, I might even win something. Also, this is why I don't have a video yet. You see, I had to ship my table off to Georgia a few weeks ago, so I haven't been able to get video of it. Never fear though, it is coming.

Thursday, May 1, 2008

Creating a New FTIR Frame

To be honest, my first FTIR frame was quite hacked together and only yielded mediocre results. The design of using the U-shaped "foobar" thing was fatally flawed in a few different ways. Firstly, the U wasn't deep enough to hold my LEDs, so they stuck out. Because of this, the acrylic wasn't actually supported by the frame, but was kinda balanced there using tape and vinyl. The coupling of the LEDs were really terrible too, some of them were not even pointing into the acrylic. Once it was all put together, it was a pain to disassemble if something broke, as shown by my experience the night before regional science fair. Even the actual slab of acrylic had its problems. It already had some scratches, and the edges were never as polished as I would have liked, no matter how long I spent with a sander. It was time to start over.

I started by picking out some new LEDs. I found some on eBay that were triple chip. They looked great, if not a little large, and the price was reasonable. When they arrived, I was very surprised. They were so bright they were practically like flashlights!

Note, these pictures were taken with a regular camera WITH an IR filter. The IR light is just so bright it is not completely blocked. Without an IR filter the picture is simply whitewashed.

Because of the large form factor of these LEDs, my acrylic needed to much thicker than before to make sure IR light is not escaping over the top and bottom of the acrylic. My brother, who owns a sign store offered to help me buy some acrylic through his connections. I could get a .47" thick piece for around $30. Best of all though, the acrylic would come pre-polished! When it arrived I was very careful not to remove the paper covering until the last possible moment, to prevent scratches. Also, I want everyone to know that it is not easy to photograph something transparent.


Notice how you can see my fingers through the acrylic. The polish is actually a lot clearer when seen with human eyes.

Now here was the big problem, how to hold the LEDs up to the edges of the acrylic? My friend helped me come up with a great (albeit simple) approach which worked wonderfully. I bought some 3/4" x 3/4" wood boards and routed out a groove .47" wide and 1/8" deep to fit the acrylic into. This would be "frame" of my FTIR frame.


Before I actually assembled the frame I measured every two inches and drilled holes for my LEDs to fit into, right up against the edge of the acrylic. Tip: Do not do this in your room, the wood shavings get messy on carpet.
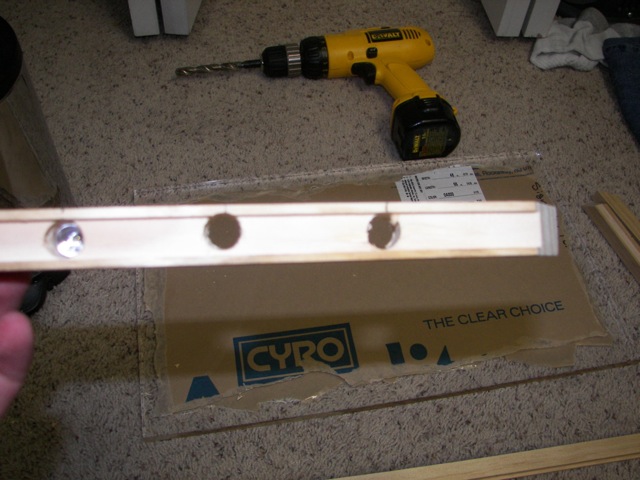


Then I assembled the four edges into one frame.
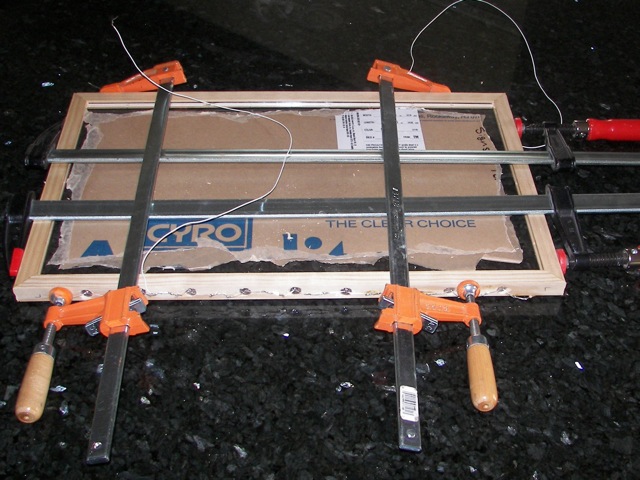
My first attempt at designing a circuit to power all of these LEDs was somewhat unfortunate. There was 28 LEDs. I wired them up with 4 parallel circuits of 7 LEDs, along with a resistor to drop the leftover voltage. What I forgot to figure in was the amount of power dissipated by each resistor, which ended up being over 1/2 watt for a 1/4 watt resistor. Needless to say, the resistors started getting pretty hot. I rethought my circuit and re-soldered everything into two circuits of 10 and one of 8. This worked much better.


When everything was all turned on the FTIR frame was very bright (to my IR cam anyway). Here are a few pics taken from my webcam with no IR filter (or autofocus).
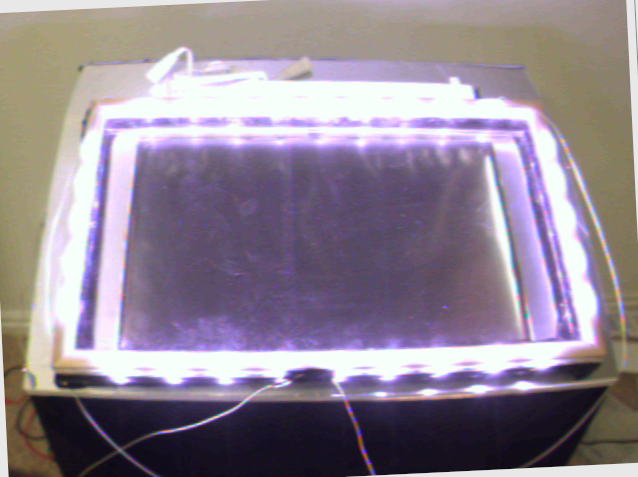


While the above photos show how bright the LEDs were, I was still unsure how well the FTIR would work with such big LEDs or thick acrylic. I was very pleased to see that the improvement was dramatic. The following pictures are comparisons of my old FTIR frame to my new FTIR frame. They were all taken by my new camera which has four layers of photonegative as the IR filter.

Old Frame - Hard Contact

New Frame - Hard Contact

Old Frame - Zero-Force Contact

New Frame - Zero-Force Contact

Old Frame - Drag

New Frame - Drag


As shown by the above pictures, the blobs created by the new FTIR frame are vastly improved, especially for light touches and quick movements. The improvement is directly reflected in the performance of the multi-touch table. Before, users would need to use a lot of force with the largest part of their finger pads while moving very deliberately to get the touch to register. Now a natural gesture with normal force works just as well.

Buying a New Webcam

After experimenting around with my first table revision, I realized that my camera had to go. It was a USB 1.0 connection, and the delay was pretty much unbearable. From the nuigroup forums, it looked like there was two firewire cameras that were commonly used for multi-touch projects. There is the Unibrain Fire-i™ which runs for about $120 and the Firefly® MV for about $300. I got the Unibrain Fire-i. Now that the USB 1.0 is gone and replaced by firewire the delay is almost unnoticeable. Another plus to the Unibrain Fire-i is that it worked on OS X without the Macam driver. It certainly was more expensive, but the upgrade was much needed. If anyone else is interested, I would definitely recommend this camera, but be warned that the lens comes with an infrared block coating that cannot be removed without damaging the lens. I ended up buying a replacement lens, being really careful to note that it did not block IR.