Making My Table's Body
After my LCD screen was taken apart it was pretty much useless until I got a new way to mount it, so I created my table's body next. I figured my camera could see my whole screen area from about two feet away, so that is how big my table was going to be. To make sure I got all my measurements right I first made a model in Google SketchUp. It was my first time using said program, but it was extremely easy to use. Here is my first draft.

I really liked this first design, but it wasn't very realistic. First, it wasn't two feet tall. Second, the table would need walls, so the backlight wouldn't be shining all over the place. Third, I don't own a Mac Mini.
So I went back to the drawing board. This time I didn't do all the fancy textures though, as they were really starting to tax my poor little MacBook by the end of the first model. The second model is not nearly as cool looking, but I was able to incorporate the slanted tabletop. I like that. Here is the second (and final) try:
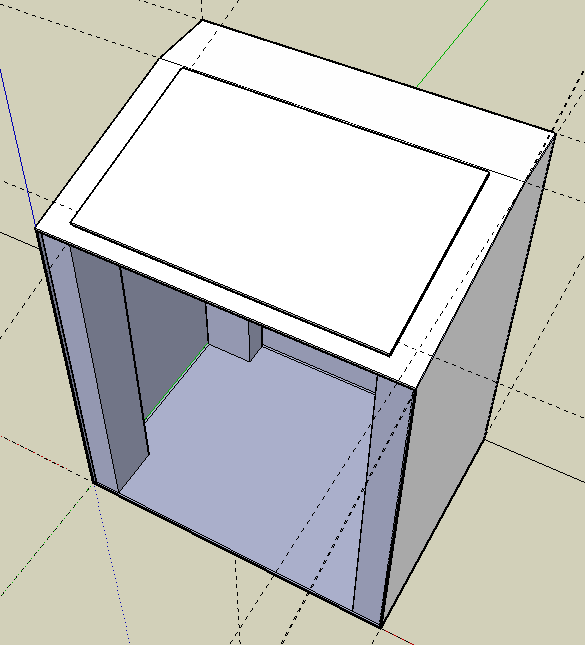
First I made the tabletop. It was made out of a piece of leftover PVC from my brother's store, Signs By Tomorrow. We cut out a hole 1/8" smaller than my LCD panel. Then I used a Dremmel to carve out a little ledge for my LCD panel to sit on flush with the table's surface. To make the little crook in the tabletop we sawed a short line about 3/4 of the way through the panel and then bent it.
I have never done any woodworking (besides making a few things out of balsa wood for the sole purpose of crushing them) so I had my brother-in-law help me build the rest. I used 2x4's (which are not really 2" x 4" !) as my legs, then I made walls using some b-board my family had leftover from a bathroom remodeling. It went really smoothly. All the measurements were taken from the Google SketchUp model so everything fit together really great. I am sorry, but I didn't have my camera there as I constructed my table, so I have no pictures here.
Attaching the LCD panel was really easy once I had the table done. I simply placed my LCD panel in the little groove I had created for it, then ran the wires down below and attached the circuit board and power supply to the underside of the tabletop. Here is a picture of the inside of my table, looking up. Those wires are from the original backlight, which I tried to use but failed.

So I went back to the drawing board. This time I didn't do all the fancy textures though, as they were really starting to tax my poor little MacBook by the end of the first model. The second model is not nearly as cool looking, but I was able to incorporate the slanted tabletop. I like that. Here is the second (and final) try:
I have never done any woodworking (besides making a few things out of balsa wood for the sole purpose of crushing them) so I had my brother-in-law help me build the rest. I used 2x4's (which are not really 2" x 4" !) as my legs, then I made walls using some b-board my family had leftover from a bathroom remodeling. It went really smoothly. All the measurements were taken from the Google SketchUp model so everything fit together really great. I am sorry, but I didn't have my camera there as I constructed my table, so I have no pictures here.
Attaching the LCD panel was really easy once I had the table done. I simply placed my LCD panel in the little groove I had created for it, then ran the wires down below and attached the circuit board and power supply to the underside of the tabletop. Here is a picture of the inside of my table, looking up. Those wires are from the original backlight, which I tried to use but failed.
Labels: construction, multi-touch
posted by Bridgeyman at
8:26 PM
![]()


0 Comments:
Post a Comment
<< Home